Metal Model Kits for Adults: How to Build One, Step by Step
Nov 9, 2026 · The Editors
How 3D metal model kits work, the tools that make building one easier, a step-by-step method for cutting, bending and joining the parts, and the mistakes that snap tabs.
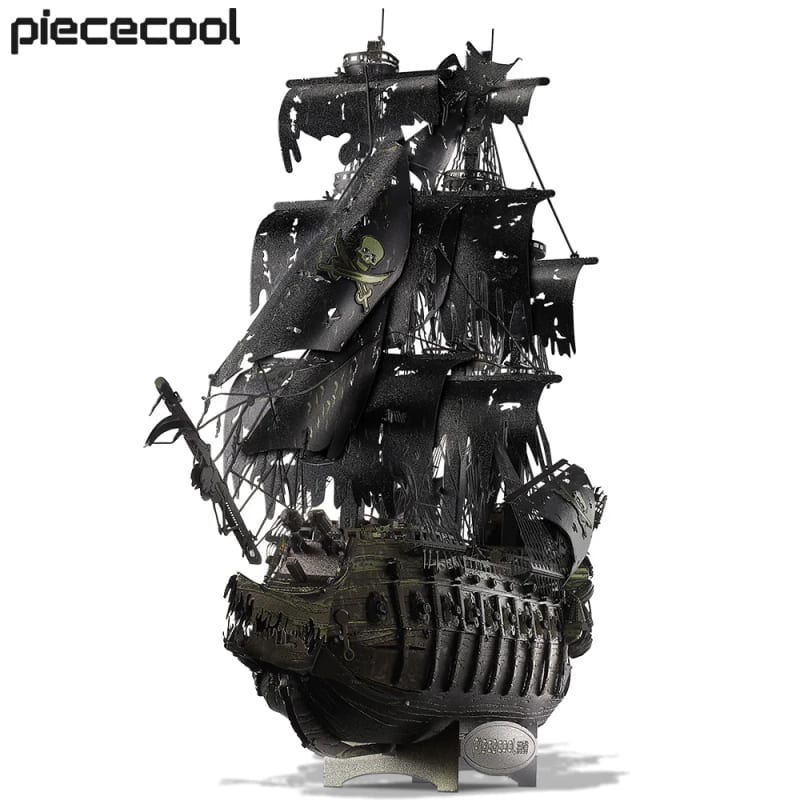
A 3D metal model kit arrives as a few flat sheets of thin metal, each etched with dozens of tiny parts. There is no glue and, in most kits, no screws. You snip out the parts, bend them into shape, and join them by pushing small tabs through slots and twisting them. Hours later you have a detailed model — a ship, a building, a machine — that looks far more complicated than the sheets it came from.
How metal model kits work
The parts are cut into the sheet by a laser or by chemical etching and held in place by small connecting bridges. Each part has tabs (small tongues of metal) and slots. Push a tab through its slot and fold or twist it, and the parts are locked.
Most kits come with an instruction sheet of numbered diagrams and no words, so following the numbers in order is the whole game.
Tools that make it easier
| Tool | What it is for |
|---|---|
| Small flush cutters | Snipping parts off the sheet cleanly |
| Fine flat-nose pliers | Bending straight folds and twisting tabs |
| Fine round-nose pliers or a thin rod | Curving parts (a pen barrel or cocktail stick works) |
| Tweezers | Holding tiny parts and guiding tabs into slots |
| A bright lamp | Seeing the etched fold lines |
Some kits include a tiny pair of cutters or a pair of tweezers. Better tools make the work noticeably more pleasant, but you can build a first model with a basic pair of fine pliers and nail clippers.
How to build a metal model kit, step by step
- Read through the instructions once before cutting anything, so you know which parts go together first.
- Cut each part off only when you need it. Parts look alike; loose ones get lost and mixed up.
- Cut close to the part, not the sheet. Snip the bridges right at the part's edge so there is no stub to file. Never twist a part out of the sheet — bending the bridges back and forth stresses the metal.
- Bend on the fold lines. Many kits have half-etched lines on the fold. Use flat-nose pliers to fold cleanly along them in a single movement.
- Curve before you join. Roll curved parts around a rod while they are still separate. It is far harder once they are attached.
- Join with tabs. Push the tab through its slot and twist it a quarter turn, or fold it flat, just enough to hold.
- Build in sub-assemblies. Make the hull, the masts or the base as separate units, then join them.
The mistakes that snap tabs
Thin metal suffers from metal fatigue: every time you bend it back and forth, it weakens. A tab twisted, untwisted and twisted again will often snap off. So:
- Twist each tab only once, and only as far as it needs.
- Dry-fit parts before you twist anything.
- If a tab breaks, a dot of glue will rescue the joint.
The edges of the parts can be sharp, so take your time, keep a tray to work in, and keep cut-offs away from pets.
Which kit to start with
Pick a subject you would like to look at when it is finished. A ship is a popular first build: many repeated parts (masts, sails, railings) teach the technique, and the result is impressive on a shelf. Our Flying Dutchman metal model kit builds the legendary ghost ship with its ragged sails — read the legend of the Flying Dutchman while you build it.
A metal model is a puzzle in the best sense: it rewards care rather than speed. If that appeals, see wooden puzzles for adults for other brain teasers made to keep.
Mentioned above