How to Write with a Quill Pen: A Beginner's Guide
Nov 5, 2026 · The Editors
How to write with a quill pen and ink: preparing a new nib, dipping, the right angle and pressure, paper and ink to use, cleaning up — and a short history of the quill.
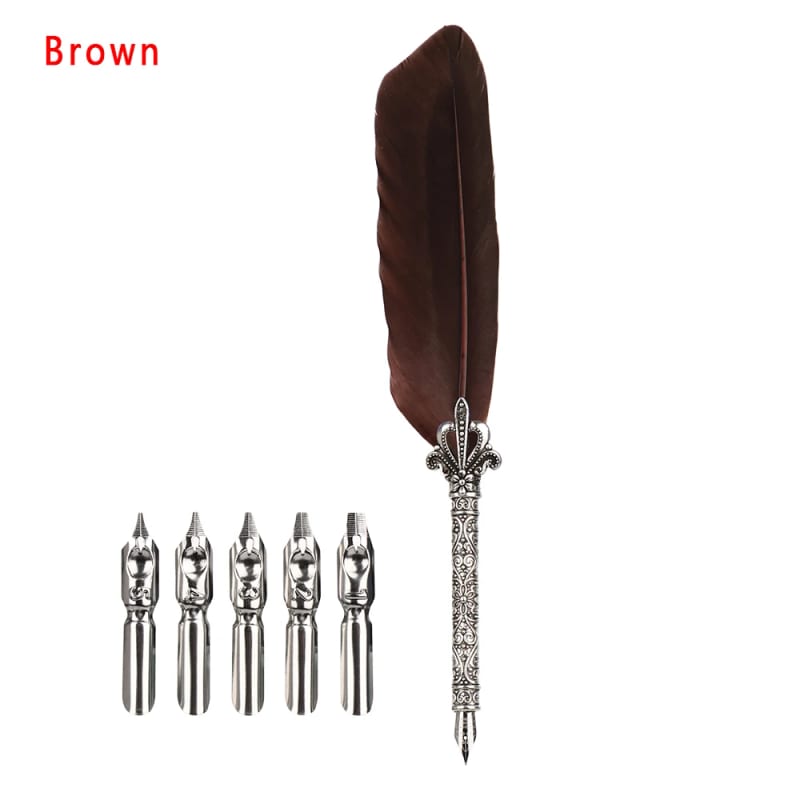
A quill pen has no ink inside it. You dip it, write a few words, and dip again — the way letters, ledgers and declarations were written for well over a thousand years. It takes ten minutes to get the feel of, and the slow rhythm is half the pleasure.
Most quill pens sold today, ours included, pair a real feather with a metal nib at the tip. A steel nib holds an edge far longer than a cut feather, so everything below is written for that kind of pen.
What you need
- A quill pen with a nib.
- Ink. A dip-pen or calligraphy ink works best — India ink for crisp black lines, or a dip ink in any colour you like. Fountain-pen ink works too, though it is thinner and flows faster.
- Smooth, heavier paper. Thin printer paper feathers and bleeds. Smooth paper of around 90 gsm or more, or a calligraphy pad, gives clean lines.
- A scrap of paper towel for blotting and cleaning.
Prepare a new nib
New metal nibs often carry a thin film of oil from the factory, and ink will bead on it instead of clinging. Before the first use, wipe the nib with a little warm soapy water, rinse it and dry it. (Some people pass it very briefly through a flame; washing is gentler and works as well.)
Screw or push the nib firmly into the shaft.
How to dip
- Dip the nib into the ink just past the small hole in its middle — the vent. Any deeper and ink floods the shaft.
- Lift it out and touch the back of the nib against the rim of the bottle, so the excess runs off and does not fall in a blot on your page.
A good dip writes a few words to a line, depending on the nib and the ink. When the line starts to fade or scratch, dip again.
Angle, pressure and direction
- Hold the pen at about 45 degrees to the page, the way you would hold an ordinary pen, with the slit of the nib running straight along your stroke.
- Press lightly. A nib writes with its own weight and a touch more. Press harder and the two halves of the nib spread for a thicker line — that swell is what makes calligraphy look like calligraphy.
- Pull, don't push. Draw strokes towards you or sideways. Pushing the nib up against the grain of the paper catches and spatters.
- Go slowly. Speed is where blots come from.
Left-handed writers do best with the paper turned well to the right and the hand kept below the line, so it does not drag through wet ink.
Using the five nibs
The nibs that come with a quill set differ in the width of their tip. Use the finest for everyday writing and addressing envelopes, and the broader ones for headings, names and signatures. Swap them out when the ink is wiped off, never while it is wet in the shaft.
Cleaning up
Ink that dries on a nib makes the next session scratchy. When you finish, dip the nib in clean water, wipe it dry on paper towel, and store the pen with the nib dry. India ink in particular should never be left to dry on the metal.
A short history of the quill
Feather quills replaced the reed pen in Europe in the early Middle Ages and stayed the writer's tool for more than a thousand years. The best came from the large flight feathers of geese and swans, hardened, cut to a point and slit with a small knife — the original "pen knife". Every monk, clerk and letter-writer recut their quill as it wore down.
In the 1800s, factories in Birmingham, England, began to turn out cheap steel nibs by the million, and within a few decades the cut quill had all but disappeared. The feather survived as a handle, which is why a quill with a metal nib is still the pen people reach for when a signature should look like it means something.
As a gift
A quill pen is a lovely present for a wedding guest book, for someone taking up calligraphy, for writers, and for anyone who still sends handwritten letters. Add a bottle of ink, because ink cannot travel by post with the pen.